This tutorial will show you how to change your post title font by using
Google Fonts in
Blogger. Google offers over 500 fonts for online use, and I promise it is simple to do!
1. Go to
Google Fonts and find the font you would like to use for your post titles. For my blog I picked 'Satisfy' for my post titles. Next to the font you picked you will want to click the 'Quick Use' Link.
2. You will need to copy these codes to use in the next step.
3. Next, log into your blog. Go to your 'Template' Page and click 'Edit HTML'.
4. In this step you will be looking for the <head> tag within your template code. If you click CTL+F it will bring up a search box in which you can type <head> into that box.
Copy code number 3 from your google fonts page and place it directly above the <head> tag. After you paste the code, you will need to place a forward slash (/) before the > at the end of the code.
EXAMPLE:
My code before: <link href='http://fonts.googleapis.com/css?family=Satisfy' rel='stylesheet' type='text/css'>
My code after: <link href='http://fonts.googleapis.com/css?family=Satisfy' rel='stylesheet' type='text/css'/>
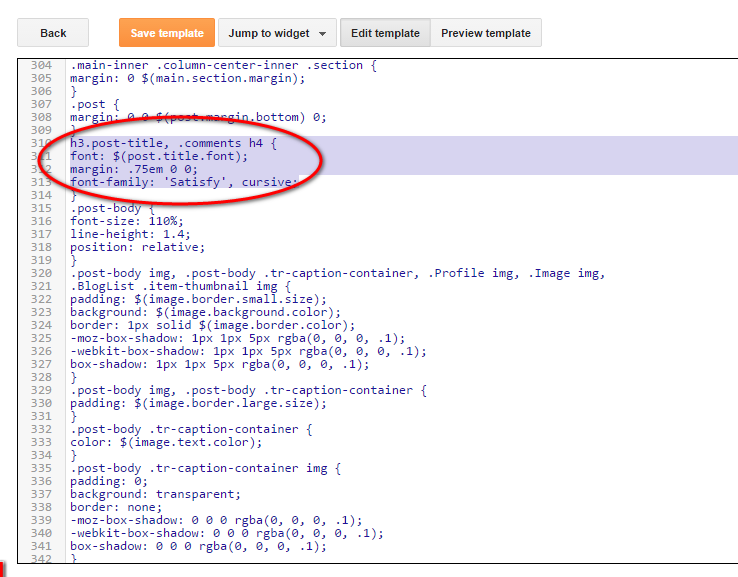
5. Go to your search box again by hitting CTL=F and search for /* Posts. You will find a code that looks similar to this...
Directly above the closing bracket (}) you will insert your code number 4 from your google web fonts page. My code ended up looking like this...
h3.post-title, .comments h4 {
font: $(post.title.font);
margin: .75em 0 0;
font-family: 'Satisfy', cursive;
}
6. Save the template and you are ready to love your new post title font.
NOTE: If you would like to make the font a little larger go to the 'Template' page and click 'Customize.' Then you will need to click on the 'Advanced' and 'Post Title'. This is where you can change the font size of your post title!
HERE IS WHAT MY POST TITLES ENDED UP LOOKING LIKE: